Do Now List and Actions Training Guide
Find downloadable version at the bottom.
Automated actions
Automated actions are added for a job using the process automation engine. Administrators work with their account manager to define how actions flow from one action to the next. Here is an example of how the process automation engine works.
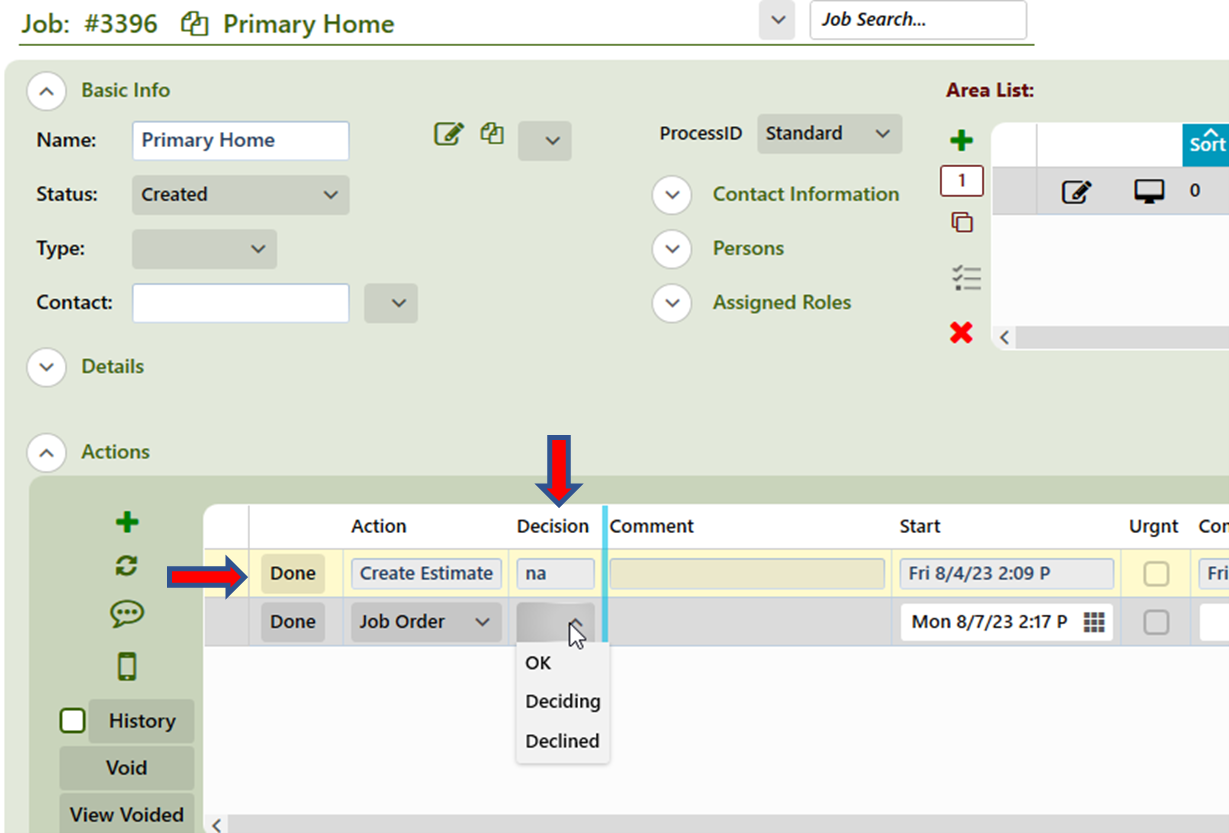
1. Once your customer and job has been created, click on the "Green Plus" sign in the "Actions" section within the job to start the process. (Depending on your shop's settings, the first action may populate automatically.) In this example, the first action in this job process is "Create Estimate."
Checking the DoNow List
The Do Now list shows all the actions that are assigned to a specific user that are due today or earlier and have not yet been completed. These actions should be completed before the end of the day.
Actions will can be added to the Do Now list in one of two ways:
1) as a manually added action, or
2) as an automated action (process automation engine).
If you are logged in as a user, your Do Now list will show in the upper right-hand corner of the screen automatically. You can select another user from the drop down if necessary to check another list.
- The number of actions assigned to the selected user shows to the right of the Do Now dropdown.
2. You can check actions that are due in the future. To select a future date, enter the number of days ahead in the "Future Days" text box. The list will show the actions that will become due within the selected number of days. The "Start" column will show the date the action is due.
3. When you click an action in the Do Now list, ActionFlow will take you to the customer and job associated with that action.
4. You can adjust the due date for an action by clicking on the calendar icon located in the "Start" box. Select the date and hit close. Remember to click the "Save button located in the upper right-hand corner. If the button is grayed out, ActionFlow autosaved your change.
5. You can filter the actions in the Do Now List to view a specific action. The star is the default and will show all actions due for the user. Use the drop down to filter the actions based on action type. To view all the actions after filtering for a specific action, select the * icon in the dropdown menu.
In many situations, actions are automatically added in ActionFlow by the process automation engine. However, sometimes you will want to manually add an action. To manually add an action, take these steps:
- Go to a customer under the "Customers" tab on the home screen.
- Click on the "Job" section to expand the screen.
- If you have more than one job in the "Job List," select the job to which you will be adding the new action.
- Click on the "Actions" section to expand the screen.
- Click on the "Green Plus" sign that is located under the "Actions" section.
- Once the new action is created, click the dropdown in the "Action" column to select the type of action you are adding.
By default, ActionFlow will show only uncompleted actions in the actions list. Click the History button to show all actions on a job, including completed actions.
Adding comments
Adding comments to a job can be useful for tracking information related to the job that doesn't require immediate action but is important to have in the job history. Comments are also used to communicate with others in your shop regarding a job; the conversation is stored in the job history for future reference.
To add a comment, click the speech bubble symbol in the Actions section.
Comments can be used to document something that happened with the job but does not require further action by you or anyone else. The comment is a way to add a note to the job history that will help to explain circumstances in the future for someone looking back.
- Once the "Comment" action has been added, fill out the comment text box. Right click to expand the text box.
- Once you type the note, click the "Done" button to close out the note.
- The note will be in the history but will NOT show in a Do Now List because it has been completed.
- The "Completed" box will be filled in with the date and time the comment was entered, and it will also show the user who closed out the action.
Option 2- Adding a Comment to a Do Now List (Yours or Another User)
Comments are often used to communicate with other employees about a job.
- Once the "Comment" action is added, fill out the comment text box. Right click to expand the text box.
- In the "Start" box, select the date you want the comment to be added to a Do Now list. (The default will be the current date)
3. Select the "User" that you want to send the comment to. You can send this comment to your Do Now List or send it to another registered user.
4. If the comment is urgent, you can click the checkbox in the "Urgnt" column which will put the action in red at the top of the Do Now list on the start date.
5. Click the "Save" button. If the button is grayed out, ActionFlow autosaved.
6. This action will now show in the user's DoNow List on the start date.
7. DO NOT click the "Done" button. The Comment will stay active until the assigned User clicks on the Done button to close out the note.
8. To continue the conversation, your team can either add notes to the same comment action or create a new comment action to respond back and forth. The most important step in either case, is to assign the user to the recipient of the comment once you have responded.
9. Once you are ready to close out the conversation or comment, click on the Done button. This will complete the action and store the conversation or comment in the job action history.